Applications and DIY Uses of UV/Black Lights

Master Epoxy Curing with UV LED Strips – Fast & Flawless!

Master Epoxy Curing with UV LED Strips – Fast & Flawless! Read More »

Check out our black light collection!

Master Epoxy Curing with UV LED Strips – Fast & Flawless!

Crafting with epoxy resin has transformed how artists and hobbyists bring their artistic designs to life. The crystal-clear, glass-like finish offers unmatched versatility, making it ideal for jewelry, tabletops, woodworking, and intricate objects. Whether you’re embedding elements or creating massive statement pieces, this secret ingredient delivers both strength and durability.

With UV LED strip lights, the curing process becomes faster and more efficient, allowing crafters to move quickly to the next step without the long wait times of traditional methods. This method has become a popular choice among enthusiasts, professional artisans, and DIY crafters looking to achieve precision in their projects.

The evolution of epoxy resin dates back to the 1940s and 1970s, yet its applications have expanded, now used in military, aerospace, and crafting industries alike. The introduction of two-part and single-part mixtures has made the process more accessible, ensuring quick curing times while maintaining excellence in results. From encapsulating creativity in small trinkets to designing massive masterpieces, this alchemy blends science with imagination.

Hobbyists and experts alike now rely on this time-saving wonder to turn their visions into reality, pushing the boundaries of what’s possible in crafting and design.

The Benefits of Using UV Light For Epoxy Resin

Faster Curing Time with UV Light

Using UV light for curing epoxy resin offers a significant advantage over traditional methods. Instead of waiting several hours or days for thick layers to cure, you can achieve results in minutes, saving valuable time. This fast and convenient way to cure resin improves efficiency, giving you more time to focus on the next part of your project. The faster process not only reduces curing time but also ensures a quick turn-around, allowing you to complete tasks faster and more effectively. The enhancement in speed is a game-changer for creators looking for a reliable and alternative method to cure resin efficiently

Increased Efficiency with UV Light

UV light curing is an efficient process that eliminates the need for drying methods that take longer and often pose a safety risk. Compared to traditional methods, UV light drastically shortens the time required to cure epoxy resin, helping you complete projects faster. This faster curing increases productivity, allowing for a quicker turnaround and reducing the chances of damaging materials. By using UV light, you can ensure more consistent results without the heat that may affect certain resins. Identifying these differences in curing methods is important for anyone working with epoxy resins.

Enhanced Clarity: 

Using UV light for curing epoxy resin ensures a crystal-clear and glossy finish on your projects. This method is key to achieving transparency, making it perfect for encapsulating objects or creating jewelry. UV light cures the resin uniformly, resulting in a smooth, flawless surface. The light promotes a desirable finish, enhancing both the visual appeal and durability of the final product. If you want your epoxy resin to look its best, using UV light is the way to go.

Reduced VOCs: 

When using UV light for curing epoxy resin, there is a significant reduction in volatile organic compounds (VOCs) released during the process. Unlike traditional methods, UV light eliminates the need for heat and significantly reduces emissions, making it a more eco-friendly option. This not only helps in maintaining health and protecting the environment but also ensures that you are working with safer materials. Proper preparation and techniques are crucial when using UV light to cure epoxy resin.

Epoxy and UV Resins – What Makes Each One Special

Epoxy resin is a two-part mixture that, once combined, creates a sticky substance. After being poured onto wood, metal, or plastic, it must be left to cure for several hours or even longer, depending on temperature and humidity. This process creates a hard, durable surface that can withstand wear and tear. However, the curing time can be lengthy, requiring patience and careful environmental control to ensure the best results.

In contrast, UV resins cure much faster when exposed to UV light, which makes them ideal for smaller projects like jewelry making or small crafts. These resins remain soft and pliable until they are exposed to UV light, which allows for shaping and molding before the cure happens. The quick curing process of UV resins makes them a great choice for projects that require a fast turnaround time, providing an efficient solution for those looking to complete their tasks in a shorter amount of time.

Factors to Consider When Choosing a UV Flashlight for Epoxy Resin

When it comes to selecting a UV flashlight for epoxy resin, there are a few factors to consider:

1. UV Wavelength

When selecting a UV flashlight for epoxy resin, one of the most crucial factors to consider is the UV wavelength. Different wavelengths, such as 365nm and 405nm, are optimal for curing various types of resins. It is important to follow the manufacturer’s instructions to ensure the proper wavelength is used, as it helps achieve the best curing results. A flashlight with the right wavelength will meet the curing requirements and ensure the epoxy resin cures efficiently and evenly, providing a smooth, professional finish to your project.

2. Power Output

When choosing a UV flashlight for epoxy resin, consider the power output. A higher power leads to a faster curing time but must be balanced to avoid overheating or causing yellowing and discoloration. For most epoxy projects, a flashlight with a power range of 3W to 10W is sufficient. Make sure to find the right balance for the curing process to avoid unwanted side effects.

3. Battery Life and Rechargeability

When choosing a UV flashlight for epoxy resin, consider its battery life and rechargeability. A flashlight with a longer battery life means you can complete more projects without interruption. Look for one that is rechargeable to save on costs and maintain convenience. This will allow for smoother curing without frequent battery changes.

4. Durability and Build Quality

When selecting a UV flashlight for epoxy resin, ensure it has durability and build quality. A sturdy flashlight made with strong materials will withstand wear and tear from frequent use. Look for one with a comfortable grip and an on/off switch for ease of use during extended periods of work. These factors are crucial for ensuring reliable performance in your projects.

5. Size and Portability

When choosing a UV flashlight for epoxy resin, size and portability are key. A compact, lightweight flashlight makes it easier to carry and handle during resin application. This flexibility is essential for working on different projects in various locations, providing more convenience for your creative endeavors.

The Curing Process:

The curing of epoxy resin happens when UV light triggers a chemical reaction. The photoinitiator in the resin absorbs the light and accelerates the polymerization process, making the material hard and durable. This reaction leads to a glossy finish and enhances the mechanical properties of the cured resin. For best results, follow the manufacturer’s instructions and ensure you mix the components in the correct proportions on a clean, dry surface to avoid moisture or other substances that could interfere with adhesion.

  1. Prepare your workspace for epoxy resin: Set up a clean, well-ventilated area for working with UV light. UV light can harm your eyes and skin, so always wear protective gear, including UV-blocking safety glasses and gloves. Make sure the space is appropriate to ensure your safety and the best results for your epoxy project.

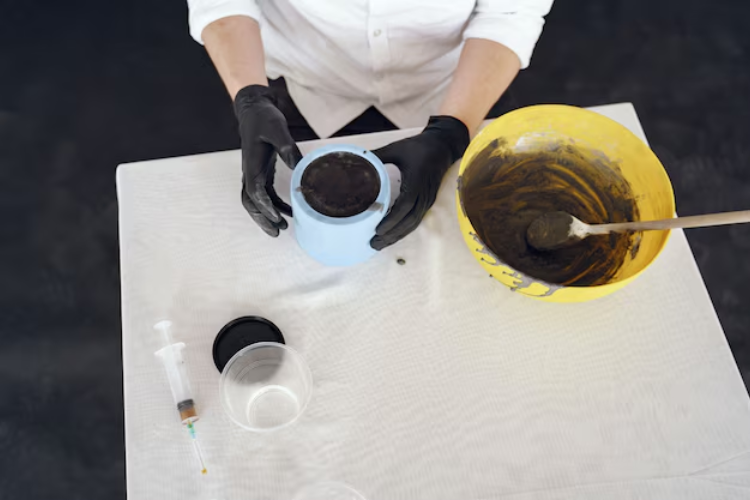
Mix the epoxy resin:

Start by preparing your epoxy resin according to the manufacturer’s instructions. Mix the resin and hardener thoroughly for an even mixture. Stir slowly for about 3 to 5 minutes to avoid bubbles. To help the curing process, you can warm the mixture slightly in a warm water bath (up to 100°F/38°C) before pouring it. This helps reduce viscosity, allowing air bubbles to pop easily and ensures a smooth finish.

  1. Apply the epoxy:

Apply the epoxy resin to the surface of your project using a suitable method like a brush or syringe. Spread it evenly to ensure it covers the entire area. Make sure to apply a consistent layer for the best curing results.

  1. Remove air bubbles: 

Remove air bubbles from the epoxy surface by gently using a heat gun or torch. Pass it over the surface to eliminate bubbles formed during mixing or application. This helps maintain a smooth finish, preventing trapped air in layers or crevices.

  1. Cure the epoxy: Cure the epoxy using the UV light source, adjusting the intensity based on the epoxy layer thickness. The curing process can take a few seconds to minutes depending on the type of resin. Always follow the manufacturer’s guidelines for the best results, especially when creating custom jewelry or intricate designs

Clean up:  After completing the work. You should clean all the tools with cleaning agents.

Dispose of waste: After curing your epoxy pieces, it’s important to properly dispose of any waste. Follow your manufacturer’s guidelines to safely dispose of materials like molds or leftover resin. Proper disposal ensures no harm to the environment and allows for a clean, organized workspace

Benefits of Using UV Light for Epoxy Curing

Fast Epoxy Curing with UV Light

UV light enables a faster curing process, allowing your epoxy resin to cure in just a few seconds. This method speeds up the curing time without compromising the strength or quality of the final piece. It’s an efficient way to complete projects quickly and move on to the next one.

 Durability and Build Quality:

UV light curing creates a strong and durable bond in epoxy resin, offering superior strength compared to other methods. It produces a cured surface that is resistant to wear and tear. Choosing a good build quality flashlight ensures that your project holds up over time, especially with extended use.

Safe and Secure:

UV light curing offers a clean, safe process. Unlike methods that require heat or chemicals, it does not produce harmful fumes or byproducts. It’s an environmentally friendly option for epoxy curing.

Battery Life and Rechargeability

For larger projects, the battery life and rechargeability of a UV flashlight are essential. Opting for a rechargeable flashlight with lithium-ion batteries ensures extended curing times. This cost-effective solution reduces the need to replace expensive bulbs and minimizes maintenance.

Overall, using UV light to cure epoxy resin is a smart choice. It is fast, strong, clean, safe, and cost-effective. Whether you are a professional or a DIY enthusiast, UV light curing can help you achieve the best results for your project.

The Role of UV Lamps and Flashlights

UV lamps and flashlights are crucial for curing epoxy resin. They emit specific wavelengths of UV radiation that react with the photoinitiator, causing the resin to harden. Choosing the right UV wavelength (365nm or 405nm) is essential for optimal curing. Make sure to check the manufacturer’s instructions for proper selection. Some devices emit both UVA and UVB, which can be harmful, so it’s important to use a UV flashlight that suits your resin’s needs without causing overheating or damage.

When selecting your lamp or flashlight, consider the output and intensity. The power can range from a few watts to several hundred, and too much can cause unwanted effects like discoloration or yellowing. Devices between 3W and 10W are sufficient for most projects. Also, for larger projects requiring extended curing times, opting for rechargeable devices with lithium-ion batteries offers convenience and cost-effectiveness. A compact, lightweight tool with a reliable on/off switch and a comfortable grip allows for greater flexibility and ease of use in creative endeavors.

Application of UV Light for Epoxy Resin

UV light is a popular and efficient method for curing epoxy resin. It’s especially effective for small projects like keychains, pendants, and bezels, making it ideal for jewelry making and sealing. The precise control of UV light allows for quicker, more consistent curing, even in tight spaces. Depending on the project, choosing the right type of UV light source is crucial, as some are better suited for larger areas while handheld devices are perfect for smaller, detailed work. With the right lamp or flashlight, you can achieve great results in a fraction of the time compared to traditional curing methods..

Preparation and Curing Techniques for Epoxy Resin

Before mixing epoxy resin, make sure to follow the instructions on the package carefully. It’s crucial to ensure the right ratio of resin and hardener to achieve proper curing. By combining them in the correct proportions, the epoxy will cure properly, giving you the best results for your project.

Thin Layers

When applying epoxy resin, it’s important to spread it in thin layers. This helps ensure the resin cures properly and avoids a tacky or uneven finish. Thick layers can make curing difficult and result in an imperfect final surface.

Air Bubbles

When you combine the resin and hardener, do it gradually and carefully to avoid air bubbles. If bubbles form, use a heat gun or a toothpick to gently remove them. This will help the epoxy finish smooth and give your final product a professional look.

Colorants and Pigments

When adding colorants or pigments to your epoxy, be sure to combine the resin and hardener carefully. This will help avoid creating any air bubbles. The right amount of pigment can make your final product look smooth and professional.

Curing with UV Light

To cure epoxy resin properly, you need a strong enough UV light source, like a lamp or flashlight. Depending on your project, exposure times will vary to ensure it cures completely.

Set and Cured Resin

To check if the epoxy resin is cured properly, gently press the surface with your fingernail. If it leaves a mark, it’s not fully cured. Once it’s hard to the touch and no longer tacky, the resin is set.

Uncured Resin

If your epoxy resin isn’t cured properly, it may still be soft or tacky. To fix this, follow the curing instructions carefully and apply UV light from a strong source. If needed, remove and start over to ensure the resin cures properly.

Factors Affecting Curing Time

To give you a better understanding of the factors that influence the curing time of epoxy resin under UV light, let’s take a closer look at each one:

  • Type and Brand of Resin:

 When choosing an epoxy resin, consider the brands and kinds available. Different formulations affect curing times, so always follow the manufacturer’s instructions. Some resins may require more UV light for a shorter cure, while others may have a longer shelf life, affecting their price and durability.

  • The Thickness of the Resin Layer:

The thickness of the resin layer can significantly impact the curing time. A denser layer will require more exposure to UV light to cure completely, while a thinner layer will cure faster. It’s an important factor to consider and experiment with to find the right consistency for your project.

  • Distance from the UV Light Source Epoxy Resin: 

The proximity of the resin to the UV light source plays an important role in the curing process. Being closer to the light will result in faster curing, while too much distance can prolong the time. Low temperatures or unstable light can also affect how the resin cures, so it’s key to keep the right distance to ensure proper curing.

  • The intensity of the UV Light:  

The power of the UV light directly affects curing time. A higher intensity will lead to faster curing, while lower intensities may prolong the process. Low temperatures can also affect the curing, so it’s important to keep the right intensity to ensure the resin cures properly and remains stable.

Can You Put Hot Items on Epoxy Resin?

Can You Put Hot Items on Epoxy Resin?

When working with epoxy resin, many people wonder if it’s safe to place hot items like a mug or plate directly onto the surface. The truth is, epoxy resin has excellent heat resistance, but there are limitations. The material’s durability and gloss can be compromised if exposed to high temperatures for too long. Typically, most resin surfaces can withstand temperatures up to around 120°F (50°C), which is fine for placing a mug or plate with a warm drink.

However, anything higher—such as a hot dish fresh from the oven—can cause irreparable damage, like heat marks or cloudiness, ruining your beautiful creations. To avoid these risks, it’s best to use coasters or trays for protection. Even though ArtResin and similar quality formulations offer strong resistance against heat, the surface needs to be fully cured before placing anything hot on it.

If not, the resin may soften, leading to indentations or other damage. So, while resined surfaces look stunning for art and decorations, always protect them when dealing with high temperatures to keep your countertops and surfaces looking flawless.

Temperature Threshold

When using epoxy resin, it’s important to check the manufacturer’s specifications to understand the maximum temperature it can withstand. Most classic resins handle up to 70°C, so a warm mug or plate placed on a resin coaster is usually fine. However, hot objects beyond this can leave a noticeable melted mark, especially if the temperature of dishes is too high when serving.

Direct Contact

Avoid placing hot items like hot pots, pans, or plates directly on your epoxy resin surface. The intense heat can cause heat marks, cloudiness, and even indentations as the resin softens, which can end up damaging the finish. Always use a protective layer to keep your resin looking pristine.

Use Protection

I once placed a steaming cup of coffee on my epoxy resin surface, thinking it could handle the heat. A few minutes later, I noticed a faint mark. This is why using protective items like trivets and placemats is important. If you set hot dishes directly on the surface, it can damage the glossy finish. To safeguard your countertop, always create a barrier between heat and epoxy resin.

Extended Exposure

I once left a hot pan on my countertop for a long time, and the heat left a dull spot. A brief exposure might not cause immediate harm, but repeated exposure weakens the finish. Over prolonged exposure, the risk of resin damage increases, making the surface lose its shine.

Curing Time

When I first made an epoxy resin table, I learned that patience is key. The curing process takes several days to weeks, and until it is fully cured, the surface is susceptible to damage. Placing hot items too soon can ruin the finish, so it’s best to wait before testing its heat resistance.

Conclusion:

Using UV light for resin curing is a faster, more efficient, and safer alternative to traditional methods. It’s an excellent choice for projects like jewelry making and woodworking. By incorporating a flashlight effectively, you can speed up the process while still achieving quicker results without compromising the strength or quality of the final cured piece. Remember to select a suitable UV light, provide proper exposure, and follow the guidelines from the manufacturer. Curing time varies based on several factors, including the type, brand, thickness, layer distance, and light source intensity

Frequently Asked Questions

Can you put hot dishes on an epoxy table? 

No. But sometimes it depends on the heating resistance of the table you are using.

Can you cure the regular resin with UV light?

Regular resin cannot be cured with UV light because it lacks the photoinitiators needed for the curing process. Unlike epoxy resin, which uses a hardener as a catalyst, regular resin requires a different method to fully harden.

Can UV resin cure without sunlight?

Yes, it is possible to curve the resin without Sun. UV resin can cure without sunlight if exposed to a UV light source like UV LED lamps. The right wavelength and intensity ensure proper curing.

How long does it take to cure epoxy resin with UV light?

Epoxy resin cures faster under UV light, often within minutes. The exact curing time depends on the light intensity, thickness, and type of resin used. For best results, ensure proper exposure and follow the manufacturer’s instructions to achieve a strong finish.

What does UV light do to epoxy resin?

UV light activates photoinitiators in epoxy resin and initiates a chemical reaction that solidifies the surface. The intensity and wavelength affect the speed and quality of the curing process. It also helps prevent yellowing and fading over time.

What is the fastest way to cure UV resin?

The quickest way to cure UV resin is by using a high-powered light with the appropriate wavelength. Always follow the manufacturer’s instructions for the best curing time and strength. Using a thin layer speeds up the process, while darker colors take longer to be cured.

Can LED lights be used to cure resin?

Yes, UV LED lamps can cure UV-sensitive resin, but the curing time varies based on the light source. Epoxy resins are typically cured under UV light within a few minutes.

Will a UV light harden epoxy resin?

When exposed to UV light, epoxy resin undergoes photochemical reactions, leading to rapid solidification. The intensity and distance from the source can affect curing time, which may take a few minutes to several hours.

Transform Your Halloween with Glow Paints: Here’s How

Transform Your Halloween with Glow Paints: Here’s How Read More »

Transform Your Halloween with Glow Paints Here's How

Halloween is all about creativity, spookiness, and fun, and what better way to take your Halloween décor to the next level than with glow-in-the-dark paints? These magical paints bring your decorations to life when the lights go out, adding a unique and eerie ambiance to your home. Whether you’re working on a DIY project or giving your costume a special touch, glow paint can make it glow like never before. Let’s dive into some fun ideas on how to use glow-in-the-dark paints to turn your Halloween into a glowing masterpiece!

You can also buy Color Powder for Halloween Parties:

How to Make Glow-in-the-Dark Jack-o’-Lanterns and Halloween Projects

Halloween pumpkins are a staple in every spooky setup, but with glow-in-the-dark paints, you can make them even more extraordinary. Let me share some tried-and-true steps for creating glowing jack-o’-lanterns and other Halloween projects. Trust me, you’ll love how these projects come to life under the blacklight!

What You’ll Need:

  • Foam or real pumpkins (or any Halloween decoration)
  • Glow-in-the-dark paint (orange, green, and neutral glow colors)
  • Resin (optional for a more durable finish)
  • Vinyl decals (for detailed designs)
  • Paintbrushes
  • Wax paper and tape (if using resin)
  • UV light or flashlight (to activate the glow)
  • Cricut machine (for detailed vinyl work)
  • Drop cloth (for easy cleanup)

Step 1: Preparing Your Work Surface
Start by preparing your workspace—cover your table with a drop cloth to protect surfaces from paint and resin spills. Ensure the table is level for best results, especially if you are using resin.

Step 2: Choose Your Decoration
Decide what you want to glow this Halloween! Foam pumpkins are a great choice, but you can also use other decorations like wooden signs or plastic skulls.

Step 3: Apply a White Base Coat
To get vibrant glowing effects, a white base coat is essential. This helps the glow paint shine brightly, especially on darker surfaces.

Step 4: Create Vinyl Decals
If you want a more detailed design, cut out Halloween-themed vinyl decals using a Cricut machine. Stick them onto your decorations—this will allow the glow paint to show through in cool patterns.

Step 5: Apply Glow-in-the-Dark Paint
With the decals in place, it’s time to add your glow paint. Apply a solid layer of glow paint in areas not covered by vinyl. Remember, multiple layers will give you a brighter glow, so take your time and let each layer dry before adding the next.

Step 6: Add Resin for Extra Glow
For a shiny and more durable effect, mix resin with a glow powder and pour it carefully onto the surface. This adds a smooth, glossy finish that helps the glow last longer.

Step 7: Let the Resin Cure
Allow the resin to cure for 24 hours, and make sure to keep your project covered to prevent dust from ruining the finish.

Step 8: Finishing Touches
Once the resin is fully cured, make any necessary touch-ups, then hang your glowing decorations with string or yarn for a spooky display.

Extra Halloween Projects with Glow Paint

Now that you’ve mastered the glowing jack-o’-lantern, let’s try some other exciting projects that will make your Halloween night

  1. Glow-in-the-Dark Yard Ghosts
    Use fabric and glow paint to create ghostly figures to haunt your yard. They’ll glow eerily in the dark, adding an extra fright to your front lawn.
  2. Glow Halloween Signs
    Light up your front door with a glowing Halloween sign, such as “Beware” or “Enter If You Dare,” using glow paint on wood or plastic.
  3. Glow-in-the-Dark Candy Buckets
    Make trick-or-treating extra special with a glowing candy bucket. Kids will love the spooky light show as they collect their candy.
  4. Spooky Eyes
    Paint large plastic eyes with glow paint and hide them in your bushes or trees. These eyes will catch the attention of trick-or-treaters and give them a fright.
  5. Footprints and Bones
    Create a chilling effect by painting plastic footprints or bones with glow paint and leaving them strategically placed on your lawn or in your garden.

Conclusion

Glow-in-the-dark paint is a fantastic way to transform your Halloween into something truly magical. Whether you’re crafting glowing jack-o’-lanterns, eerie yard decorations, or spooky costumes, glow paint brings a fresh level of creativity and excitement to your Halloween setup. So, what are you waiting for? Unleash your imagination and start crafting glowing masterpieces today!

If you’re ready to elevate your Halloween decorations, don’t forget to grab our UV black lights and glow paint powder. They are essential for bringing the best out of your glow projects!

FAQs

  1. What type of surface works best for glow-in-the-dark paint?
    Glow-in-the-dark paint works best on light-colored surfaces, especially white. If you’re using darker surfaces like foam pumpkins, start with a white base coat for the best results.
  2. Can I use glow-in-the-dark paint on real pumpkins?
    Yes! Real pumpkins can be used for this project. Just be sure to clean them and remove the stems before painting.
  3. How long does the glow last?
    The glow intensity will vary based on the paint and lighting conditions. With proper UV light exposure, the glow can last for hours, especially if you use multiple layers of paint.
  4. Can I mix glow paint with resin?
    Absolutely! Mixing glow powder with resin gives your decorations a unique, glossy finish while making the glow even more vibrant.
  5. Is it safe to use glow-in-the-dark paint outdoors?
    Yes, as long as you use paints designed for outdoor use, they should hold up well to the elements. Just ensure that your projects are properly cured and protected from rain.

Discover the Magic of Glow in the Dark Concrete – Unbelievable!

Discover the Magic of Glow in the Dark Concrete – Unbelievable! Read More »

Discover the Magic of Glow in the Dark Concrete Unbelievable

Introduction

Glow in the dark concrete is revolutionizing the way we think about outdoor and indoor spaces. Imagine walking on a pathway or driveway that glows softly at night, thanks to the power of photoluminescent technology. This robust solution enhances safety and adds a magical touch to any area. By merging natural light with artificial sources, AGT™ glow stones and Glow Sand materials help to emit a soft, ambient light.

Discover the Magic of Glow in the Dark Concrete – Unbelievable!

Whether you’re designing for public areas or your garden, this transforming feature uses luminescent aggregates to absorb and release energy, making it an eco-friendly and sustainable choice. With 30 years of experience in landscaping, Alex Ketty, the founder of Glow Path Pavers, has brought this innovative idea to life. The result? A stunning, glowing surface that’s both aesthetic and functional, with the ability to release light for hours after the sun sets.

Photoluminescent Technology

What is Photoluminescent Technology?

Photoluminescent technology is what makes glow in the dark concrete possible. This science uses special materials that absorb light, whether from the sun or artificial sources like UV light. These materials then release the energy, emitting a bright, visible glow when it’s dark. Embedded in the concrete surface, this process of phosphorescence ensures the concrete glows efficiently, even after the light source is gone. It’s a remarkable, sustainable way to light up outdoor spaces.

How Photoluminescent Materials Work

Photoluminescent materials like strontium aluminate and zinc sulfide give glow in the dark concrete its unique ability to absorb light and emit it for hours. These superior compounds are known for their high brightness and long duration of glow, lasting for minutes to hours. The durability of these materials ensures they withstand decades without significant degradation. This makes them perfect for long-term applications in outdoor spaces.

Methods to Make Concrete Glow

1. Prepare & Pour: Embedding Glow Stones in Concrete

Step-by-Step Guide to Preparing Your Concrete for Glow

  1. Clear the Area: Begin by clearing any debris, rocks, or vegetation from the site where you’ll pour the concrete.
  2. Clean the Surface: Use a pressure washer or a stiff brush with soapy water to thoroughly clean the concrete. This step removes dirt, grime, and algae, ensuring that the surface is dry and free of contaminants.
  3. Mix Glow Materials: Once the surface is ready, combine glow stones or glow powder with the concrete mix. This will embed the glowing elements into the surface for a striking effect.
  4. Pour Concrete: Pour the prepared concrete into the formwork, ensuring it is level and straight.
  5. Embed Glow Materials: While the concrete is still wet, scatter the glow stones or glow powder in a pattern to create a continuous glowing surface.
  6. Press the Materials: Gently press the glow stones or glow powder into the surface to ensure they are secure and fully embedded.
  7. Apply Epoxy or Seal Coat: After the concrete has set, apply a seal coat or epoxy to protect the glowing materials and enhance their brightness.
  8. Let It Dry: Allow the concrete to dry completely before using it. This ensures that the glow effect will last and be visible for years.

2. Glow Powder Sprinkling Technique

Step-by-Step Guide to Sprinkling Glow Powder

  1. Prepare the Surface: Ensure the concrete is clean and dry before applying any materials.
  2. Apply Adhesive Layer: Once the cement is freshly poured, apply a sticky layer of clear paint or epoxy paint to the surface.
  3. Sprinkle Glow Powder: While the surface is still wet, sprinkle the glow powder evenly to ensure it sticks.
  4. Distribute Evenly: Use your hand or a tool to distribute the glow powder across the entire surface for uniform coverage.
  5. Apply Multiple Coats: After the initial layer has dried, apply at least three coats of clear spray to seal and protect the glow effect.
  6. Enhance Brightness: The final coats will enhance the brightness of the glowing surface, making it durable and able to withstand outdoor elements.

3. Painting with Glow

Step-by-Step Guide to Painting with Glow Paint

  1. Prepare the Surface: Start by ensuring the concrete is clean and dry. It’s essential for a smooth, even finish.
  2. Choose the Right Paint: Use glow-in-the-dark epoxy paint that is durable and can withstand outdoor elements.
  3. Apply the First Coat: Once the surface is prepared, spray a layer of clear paint to create a sticky base for the glow powder.
  4. Sprinkle Glow Powder: While the paint is wet, sprinkle the glow powder evenly to achieve a bright glowing surface.
  5. Apply Multiple Coats: Let each coat dry completely before applying at least three coats of epoxy protector to seal and enhance the glow.
  6. Repeat the Process: Repeat the process until the surface has a bright, even glow. This ensures a long-lasting, luminous finish.

Design Ideas for Glow in the Dark Concrete

  • Pool Decks: Enhance your pool deck with glowing concrete for a magical touch.
  • Patios: Use glow stones to create stunning designs on your patio.
  • Outdoor Entertainment Areas: Embed glow stones into concrete seating areas and tabletops to create ambient lighting.
  • Paths & Trails: Add glowing paths and trails around your garden or property to guide guests.
  • Kitchen Countertops: Give your kitchen a futuristic touch with glow in the dark countertops.
  • Bathroom Vanities: Transform your bathroom with glowing vanity features.
  • Entertainment Areas: Add glow stones to your home projects for inspired entertainment areas.

Way-Finding Systems

Glow-in-the-dark concrete is perfect for creating way-finding systems in low-light areas. Use it to mark pathways, stairways, or hallways. The glow provides a clear, self-emitting guide, enhancing safety and navigation.

Conclusion

Glow in the Dark Concrete is an innovative trend transforming both indoor and outdoor spaces. With AGT™ glow stones, you can enhance pool decks, patios, and countertops, bringing visual interest and depth to your designs. This cutting-edge technology harnesses the power of natural light, making it an eco-friendly choice that reduces the need for artificial lighting. Whether you’re creating luminous pathways or illuminating garden paths, the possibilities are endless.

Glow Path Pavers World Headquarters is pushing the boundaries with products that glow underfoot, lighting up driveways, and even airport runways.

FAQs

1. Does glow in the dark paint work on concrete?

Yes, glow in the dark paint works well on concrete surfaces, especially when applied using water-based products that are designed for porous surfaces.

2. How long does glow in the dark concrete last?

Glow in the dark concrete can glow for 6 to 8 hours after exposure to light, with a photoluminescent compound that has a cycle life of at least 10 years.

3. Does dark concrete get hotter?

Yes, dark concrete absorbs a high percentage of sunlight, making it prone to higher temperatures during sunny weather.

4. What is the longest lasting glow in the dark paint?

Aurora’s glow paint lasts up to 24 hours if used properly and charged under UV light or sunlight.

5. How do you activate glow-in-the-dark paint?

For optimal results, charge glow in the dark paint with ultraviolet light, black light, or direct sunlight for the brightest and longest-lasting glow.

6. What makes concrete darker?

The addition of calcium chloride to concrete accelerates the setting time and can result in a darker appearance.

7. Does dark concrete fade?

Yes, sunlight, particularly UV rays, can cause dark concrete to fade over time. Protecting it can help maintain its color.

8. Can glow in the dark concrete be used for driveways?

Absolutely! Glow in the dark concrete can be used for driveways, adding both functionality and a unique aesthetic appeal.

9. How does glow in the dark concrete enhance safety?

By emitting light at night, glow in the dark concrete enhances visibility and safety, especially on pathways, stairs, and outdoor spaces.

10. Is glow in the dark concrete eco-friendly?

Yes, glow in the dark concrete is eco-friendly because it uses natural and artificial light sources to generate glow, reducing the need for artificial lighting.

Unlock the Fun: Epic Dark Bowling Game at Home!

Unlock the Fun: Epic Dark Bowling Game at Home! Read More »

Unlock the Fun: Epic Dark Bowling Game at Home!

Looking for a great way to spend a fun night with kids? Try a dark bowling game at home! This activity is perfect for summertime or any nighttime adventure. You just need some glow sticks, plastic water bottles, and a sturdy ball—a soccer ball works well. Set up your glowing pins in a line and turn off the lights. The kids will love watching the glow in the dark show as they bowl down the bottles.

It’s an easy game to set up, making it ideal for a slumber party or when hosting friends. You can even check the local dollar store for supplies or hit the party aisle at discount department stores. Gather your family and enjoy this secret game together!

Step 1: Things You Need

  • 10 or more Plastic Bottles
  • Children’s play sand,
  • Glow sticks 10 water bottles
  • 10 glow sticks in a variety of colors
  • Dry Sand

Step 2: Clean the Bottles

Open all the bottles and wash the remains of the drink out. let them dry completely.

Step 3: Add Sand

Fill the bottles about 1/4 of the way up with the play sand. using a funnel makes it a lot easier! The sand should be dry.

Step 4: Add Glow Sticks

Want to add a twist to your dark bowling game? You can make glowing pins using glow sticks! First, take each bottle and remove the cap. Follow the directions on the package to activate the glow sticks. Then, drop one inside each bottle. Make sure to replace the lid securely. Just before the game, place the bottles where you want to bowl. This simple setup gives glowing pins a fun effect. You’re nearly done! Get ready for a magical bowling night that everyone will enjoy!

Step 5: Play!!

Arrange the bottles in a triangle formation and make a mark about 3-5 meters back. Roll a ball from the mark and try to knock them over! Children play this game and enjoy it a lot.

Expert Tips

To make your dark bowling game even more fun, set a distance that fits each age group. For smaller children, allow them to stand closer to the pins. Older kids may need a more challenging experience, so they should bowl from farther back.

You can use water bottles as glowing pins by pouring a little water off the top to create a stable base. Adding a glow stick inside each bottle will make them shine brightly.

This way, everyone can enjoy the game, making it great for a slumber party or when hosting a few friends. Just turn off all the lights and get ready for a night of fun!

Conclusion:

Bowling at home can be a fun adventure, especially when you add a dark twist! Imagine kids giggling and smiling as they roll glowing balls down the lane. The dark atmosphere creates excitement and a unique experience for everyone involved. This game is perfect for playing year-round, bringing plenty of fun no matter the season. 

We can also celebrate self-expression by customizing the space with color-changing decorations.

Glitter can sparkle on the walls to enhance the ambiance. Kids love to let their light shine as they compete. Encourage them to wear their favorite tees featuring graphic designs while enjoying their time on a mini playground setup. This creative take on bowling unites play and laughter. Overall, the dark bowling experience should be a memorable one, filled with joy and a sense of community.

How to Make a Black Light with LED Lights: A Step-by-Step Guide

How to Make a Black Light with LED Lights: A Step-by-Step Guide Read More »

How to Make a Black Light with LED Lights: A Step-by-Step Guide

Creating your own black light using LED lights is a fun and creative way to add a unique ambiance to any party or event. If you’ve ever wondered how to make UV light at home, you’re in the right place. Whether you need it for aesthetics, to support plant growth with essential minerals, or for creative endeavors, making a black light is simpler than you think.

Why Make Your Own Black Light?

I’ve always loved experimenting with lighting, and black lights have a special charm. They create a colorful and exciting atmosphere that’s perfect for impressing guests. Plus, with just a few simple supplies, you can easily create your own. LED lights, especially ultraviolet light types, are a popular choice because they’re accessible and energy-efficient.

The process is relatively straightforward. Once you understand the basics—like how ultraviolet light interacts with materials to make them glow—you’ll see why this DIY project is so rewarding. From preparation to building, each step is designed to be easy, even for beginners. So, if you’re looking to add a unique touch to your home decorating or want to explore the capabilities of black lights, this guide will walk you through everything you need to know.

Make UV Light with an LED Flashlight

Here’s what you’ll need:

  • LED flashlight or standard flashlight as your base.
  • Clear cellophane in purple and blue for filtering light.
  • Yellow highlighter to create fluorescein for testing.
  • LED strip lights with visible light-blocking paint.
  • Power supply and transparent covers for protection.

Step-by-Step Instructions

Step 1: Choose a Light Source

Start with a standard LED flashlight or LED strip as your light source. Ensure the battery is fully charged and the device is functioning by turning it on briefly. If using LED strips, inspect for fraying or exposed wires, clean them thoroughly with an alcohol-based cleaner, and cut to size if needed.

Step 2: Adjust the Frame for LED Strip Lights

Before placing the LED strip, prepare the frame by ensuring it’s clean and free of dirt. Check the area where you’ll apply adhesive to guarantee a smooth and secure fit. A clean surface ensures the strip stays firmly in place.

Step 3: Attach LED’s to the Frame

Using your preferred adhesive, carefully attach the LED strip to the frame. If your strip has double-sided adhesive tape, it makes the job even easier. Ensure the strip is firmly secured for the best results.

Step 4: Position the Frame Under Light and Apply Epoxy

Place the contraption under a bright light to see clearly. Gently apply epoxy on the LED strip surface for a smooth finish. If using cellophane, lay it carefully to avoid air bubbles and ensure even coverage.

Step 5: Apply Blacklight Paint for a Glow Effect

Start by carefully applying blacklight paint in thin, even coats to make the frame absorbent and visible under UV light. Wait for each coat to dry before applying another, ensuring a safer and smoother finish. Follow this process until you’re satisfied with the glow!

Applications of Black Light

Parties and Clubs

Black lights are a popular choice for creating a fun, vibrant atmosphere. They highlight decorations and make glowing elements visible, perfect for dancing and socializing.

DIY Projects

These lights are a staple for creative projects, adding a unique touch to home decor or party setups. They’re easy to use and affordable, making them a versatile tool.

Video Production

Often used for special effects, black lights enhance the mood and add depth to scenes. They create a surreal, otherworldly look, making videos more interesting.

Glowing Decor

With glowing cellophane or backdrops, black lights add flair to any space. They’re perfect for highlighting creative designs and adding a touch of magic.

Conclusion

Black lights are a fun and versatile tool with a variety of uses, from throwing a glowing party to creating cool DIY projects or working on video production. They add a unique and interesting touch to any setting. Try testing your UV blacklight with fluorescein extracted from a yellow highlighter pen dipped in a rubbing alcohol solution—the results are incredible! If you enjoyed learning how to make a UV light with LED lights, keep experimenting with DIY projects to discover even more creative applications for your homemade creations.

FAQs

1. What materials do I need to make a black light with LED lights?

You’ll need LED strip lights, a transparent filter (like epoxy or cellophane), a power supply, and a frame to hold everything together. Optional items include blacklight paint for extra glow effects.

2. Can I use any LED strip lights to create a black light?

Not all LED strips work. You need UV LED strip lights specifically designed to emit ultraviolet light, as regular LEDs won’t produce the same effect.

3. How do I test if my DIY black light is working?

Use a yellow highlighter pen or fluorescein mixed with rubbing alcohol. Under the black light, these materials will glow brightly, confirming your setup works.

4. Are there any safety precautions I should take when using UV lights?

Yes, always avoid looking directly at the UV light source and wear protective eyewear. Prolonged exposure can harm your skin and eyes, so use sunscreen and limit direct contact.

5. What are some creative ways to use a DIY black light?

You can use it for glowing party decor, DIY art projects, video production effects, or even to highlight fluorescent designs on walls or clothing. The possibilities are endless!

5. What are some creative ways to use a DIY black light?
You can use it for glowing party decor, DIY art projects, video production effects, or even to highlight fluorescent designs on walls or clothing. The possibilities are endless!

How to Use Black Light: A Beginner’s Guide

How to Use Black Light: A Beginner’s Guide Read More »

How to Use Black Light: A Beginner's Guide

Throwing a party with black light is a great way to create a fun, electrifying vibe. These UV lights give off a type of ultraviolet radiation that makes certain materials glow in the dark. It’s a cool effect that’s completely invisible to the naked eye until it interacts with the right surfaces. 

Making Your Party Glow with Black Lights

Whether you want to add a spooky touch to your Halloween decorations or just make your event stand out, understanding how these lights work is key. Different wavelengths of light can affect materials in unique ways, so choosing the right setup for your needs ensures you get the desired effect. Once you get the basics, it’s easy to use them like a pro.

Key Takeaways

  • Black lights are special lights that emit ultraviolet radiation, making certain materials glow in the dark.
  • Understanding how a black light works is key to using it effectively.
  • There are different types of black lights with different wavelengths, each affecting materials in a unique way.
  • Some materials and certain substances react under UV radiation, creating a glowing effect.
  • Additionally, black lights have a variety of practical applications, including forensic investigations, cleaning, and medical treatments.

Understanding Black Light

Black light is a type of ultraviolet light, part of the electromagnetic spectrum. It’s invisible to the human eye because it has a shorter wavelength, ranging between 10 and 400 nanometers. This places it just outside the visible spectrum, which is only a small part of the entire electromagnetic spectrum. The spectrum also includes radio waves, microwaves, infrared radiation, ultraviolet radiation, X-rays, and gamma rays.

Types of Black Lights

When it comes to black lights, there are several types to choose from, each with its unique characteristics and uses. Let’s break them down:

  1. Fluorescent Lamps:
    • These are the most common types of black light.
    • When turned on, they use a phosphorescent coating inside the lamp to emit ultraviolet light.
    • They’re relatively inexpensive and widely available, making them perfect for entertainment like nightclubs and concerts.
  2. Incandescent Bulbs:
    • These are similar to regular incandescent bulbs but have a special coating that filters out visible light and allows ultraviolet light to pass through.
    • They’re not as efficient as other types but are relatively inexpensive.
  3. Ultraviolet Lamps:
    • These emit a high level of ultraviolet light.
    • They’re often used in scientific applications, like laboratories, or even for pest control.
  4. Mercury-Vapor Lamps:
    • These are high-intensity lamps that emit a large amount of ultraviolet light.
    • They’re commonly used in industrial settings, such as printing and curing processes.
  5. LED Lights:
    • A newer type that uses light-emitting diodes to emit ultraviolet light.
    • They’re highly energy-efficient and have a long lifespan, making them great for portable uses.
    • You can also buy LED UV lights from Majesticglimmer Shop
  6. Blacklight Blue:
    • These emit a higher level of ultraviolet light and are often used in forensic investigations.
  7. Lasers:
    • These can act as a black light source, emitting a very high level of ultraviolet light.
    • They’re primarily used in scientific research.

When choosing a black light, consider your specific needs and the application. For example, I’ve used fluorescent lamps for entertainment and LED black lights for portable tasks. Always wear proper eye protection when working with black lights, as prolonged exposure can cause eye damage. Be aware of what you’re exposing to the light, as some materials can be toxic or flammable.

How Black Light Works

Black light, also called UV light, is a type of light that’s invisible to the human eye. It has a wavelength between 10 and 400 nanometers, which is shorter than visible light. Special lamps produce black light by emitting UV radiation.

When UV radiation hits certain materials, it makes them fluoresce. This happens because the light excites the electrons in the material, causing them to move to a higher energy level. When the electrons return to their original energy level, they release energy in the form of visible light.

Fluorescent materials, like dyes and phosphors, absorb UV light and respond by glowing. For example, a white shirt treated with fluorescent dye will glow under black light. Glow-in-the-dark materials also contain phosphors that absorb energy from UV light and release it slowly over time, creating a glowing effect.

You can use filters to block out visible light and enhance the glow. Black light is also a powerful tool for studying molecules and materials. By exciting electrons, it helps reveal the structure and properties of substances. For instance, certain plastics contain fluorescent or phosphorescent materials that can be detected with black light.

I’ve used black light for detecting and analyzing things that are difficult or impossible to see with the naked eye. Its wide range of applications includes forensics and art conservation.

Everyday Uses of Black Light

Black lights are commonly used for illumination in various settings, like the lighting industry, amusement parks, and nightclubs. They’re not just for fun—they have practical purposes too. For example, they can help detect counterfeit money or check for stains on clothing. To use one, just plug it in, turn it on, and make sure the room is dark. Black lights work best in low-light conditions, creating a cool glow effect that can be enhanced with special paints or markers.

Always protect your eyes when using black lights. Never look directly at the light, and avoid prolonged exposure. Some black lights emit visible light, which can be distracting or interfere with the desired effect. To fix this, choose a black light with a filter that blocks visible light. For portable use, flashlights with black light features are perfect for outdoor activities like camping or hiking. They’re also great for spotting pet stains or checking hotel room cleanliness.

Black lights are a versatile tool. With the right equipment and proper precautions, they can create an exciting experience in any setting

Black Light in Different Industries

Black light is a versatile tool used in various industries for different purposes. From forensics to entertainment, its unique properties make it invaluable. In healthcare, it helps diagnose skin conditions like vitiligo and psoriasis. In art and design, it creates stunning glow-in-the-dark effects. For security, it detects counterfeit money and verifies the authenticity of documents. Even in sanitation, it’s used to ensure cleanliness by revealing hidden contaminants.

I’ve seen black lights used in nightclubs to create a vibrant atmosphere and in forensic labs to uncover hidden evidence. Its applications are endless, making it a must-have tool in many fields.

Testing Laundry Detergent

To test the effectiveness of laundry detergent, apply it to clothing and place it under a black light. Any remaining stains will glow, helping the manufacturer improve the formula.

Detecting Counterfeit Money

In banking, black lights help detect counterfeit bills by revealing security features in modern currencies that are only visible under UV light. These features are difficult to replicate, making black light a key tool for law enforcement and forensic science.

Verifying Security Features

Black lights are used to verify the authenticity of passports, driver’s licenses, and credit cards. They help detect fraudulent materials by revealing hidden security features during authentication.

Revealing Invisible Ink

Black lights make it easier to verify documents by revealing hidden messages written in invisible ink. They’re also used in forensic investigations to detect bodily fluids and other evidence.

Working with Bug Zappers

Insects are attracted to black light and come into contact with bug zappers, where they get electrocuted. This helps control insect populations without harmful chemicals, and even scorpions and certain insects can be studied this way.

Illumination and Lighting

Black lights create unique and interesting effects, perfect for decorations, highlighting signs, and displays. They can also attract insects for pest control, making them both fun and functional.

Practical Applications of Black Light

Black Light in Forensics

Black light is a crucial tool in forensic science, helping reveal evidence not visible to the naked eye, like blood stains, urine, semen, and even counterfeit money or documents during crime scene investigations. Many materials react to black light, causing them to glow or fluoresce. In forensic investigations, it helps detect semen, blood, and urine

Art and Design

These are popular for creating unique visual effects, like glow-in-the-dark paintings and posters. It’s also used to authenticate art, as forgeries often do not fluoresce under UV light.

For Authentication and Security

These lights are commonly used to verify documents and identification, helping detect fraudulent materials like counterfeit money and passports.

Entertainment and Nightlife

It can be used for the entertainment and nightlife industry, creating a vibrant atmosphere in clubs, parties, performances, and shows. It’s also used in escape rooms and haunted houses for a spooky, immersive experience.

Health and Dermatology

Black light helps diagnose and treat conditions like fungal infections, acne, and even skin cancer. In cosmetic dermatology, it’s used to promote collagen production for healthier skin.

Black Light in Food and Accessories

In the food industry, black light helps detect contaminants and ensure safety, while also being used to enhance the appearance of items like white wine and tonic water, making them glow. It’s also used to check the fluorescence of jewelry and gemstones.

Sanitation and Disinfection

Black light is used in sanitation and disinfection to spot and eliminate harmful bacteria, germs, mold, and other contaminants. It ensures cleanliness in hospitals and medical facilities.

Medical Applications of Black Light

In medical fields like dermatology and ophthalmology, black light helps detect abnormalities such as vitiligo, psoriasis, fungal, and bacterial infections. It’s also used to diagnose conditions like cataracts, corneal abrasions, and foreign bodies in the eye. In DNA research, it helps study damage and structure, while in cancer treatment, it aids in removal and treatment. Black light is even used to promote collagen production in acne treatment, showcasing its role in modern medicine.

Domestic Uses

Everyday items like clothing, makeup, paints, and fabrics can also glow, as well as mercury vapor, toothpaste, and nail polish. Black light is even used to create glowing flowers and artistic displays, producing visually stunning effects. while also identifying substances like antifreeze, dye, and quinine in blue minerals.

Effects and Safety Concerns

Safety concerns with black light include potential damage to the eyes from prolonged exposure to UV rays, which can harm the cornea and retina, leading to vision issues or even blindness. Always wear protective eyewear when using black lights. Overuse, like in tanning beds, can increase the risk of skin damage. Black lights can also disrupt insects and ecosystems. The Wood’s lamp, invented by Robert Williams Wood, is a key piece of technology in this field.

FAQs

1. What is black light, and how does it work?

Black light is a type of ultraviolet (UV) light that is invisible to the human eye. It causes certain materials to fluoresce or glow by exciting the electrons in those materials, making them emit visible light.

2. What are the common uses of black light?

Black lights are used in entertainment (like nightclubs and haunted houses), forensics (to detect bodily fluids and counterfeit money), healthcare (to diagnose skin conditions), and sanitation (to spot contaminants). They’re also popular in art and design for creating glowing effects.

3. Is black light safe to use?

While black light is generally safe, prolonged exposure to UV rays can harm your eyes and skin. Always wear protective eyewear and avoid looking directly at the light. Be cautious with materials that may be toxic or flammable under UV light.

4. What materials glow under black light?

Materials like fluorescent dyes, phosphors, white clothing treated with brighteners, and certain minerals glow under black light. Glow-in-the-dark materials and some plastics also fluoresce.

5. Can black light detect counterfeit money?

Yes, black light is commonly used to detect counterfeit money. Modern currencies have security features that are only visible under UV light, making it easier to verify their authenticity.

Conclusion

Black lights are a versatile tool with a wide range of applications, from creating unique visual effects in entertainment to detecting counterfeit money and analyzing materials in forensics. They’re also invaluable in healthcare, sanitation, and even art and design. However, it’s important to use them safely by wearing protective eyewear and avoiding prolonged exposure to UV rays.

Whether you’re hosting a party, conducting scientific research, or simply exploring their fascinating effects, black lights offer endless possibilities. With the right precautions and a bit of creativity, you can unlock their full potential and enjoy their exciting and practical uses.

How to Make a UV Light: A Step-by-Step Guide

How to Make a UV Light: A Step-by-Step Guide

How to Make a UV Light: A Step-by-Step Guide Read More »

Making a UV light at home is a simple process. Start by using an LED flashlight as the light source. Then, replace the standard LED with a UV LED. Create a UV filter by cutting clear cellophane into vibrant purple and blue pieces. Secure it with a rubber band or clear tape over the lens. For added power, you can use a yellow highlighter to create fluorescein, which will help you test the UV light. To connect everything, use a resistor to restrict the current flowing through the LEDs and wires to connect them.

How to Make a UV Light: A Step-by-Step Guide

How to Make a UV Light

Follow these five simple steps to create your UV light at home: Choose a light source, prepare a UV filter, layer cellophane, and test the light for glowing effects.

1: Choose a Light Source

To begin, select a light source for your DIY UV light. You can choose a standard LED flashlight that you have on hand. Confirm that the battery is fully charged and the device functions as it should. After ensuring everything is set up, test the flashlight by turning it on briefly to make sure it’s working properly.

Then, determine how many UV LEDs you want to use and calculate the resistor value needed to restrict the current flowing through the LEDs, preparing everything for the next steps in the project.

2: Prepare the UV Filter

To prepare your UV filter, start by taking a piece of clear cellophane. Cut two pieces of vibrant purple and one of blue to create a filter. Make sure the pieces are slightly larger than your flashlight lens to completely cover it without leaving any gaps.

When deciding on a light source, I had three options available: a smartphone, a small LED, and a video light.

After considering the choices, I ended up using the small LED flashlight, as it was the most convenient and likely the one most people reading this instructable would already have at home.

3: Cellophane!

Next, you’ll need to cut up pieces of cellophane or gift wrap, just big enough to cover your light source. Cut two purple and one blue pieces to make your filter. If you don’t want to spend too much money, you can use translucent candy wrappers as a budget-friendly option. If you’re looking to save, consider using this as an alternative.

Once you have the pieces, place them over the lens and check the fit. Make any necessary adjustments to ensure snug coverage. Finally, apply a rubber band or some tape to hold the cellophane in place over the flashlight.

4: Layering the Cellophane

Now, cover your light source with a cellophane, layering them over the lens. Secure the layers with some tape or a rubber band, unless you want to hold them by hand. The order in which you layer the colors doesn’t matter, but I layered mine as purple first, followed by blue.

It turned out great, and the colors enhanced the UV effect. Just make sure the layers are smooth and evenly placed for the best result!

5: Test the UV Light

Once you’ve assembled your DIY UV light, it’s time to test its functionality. First, you’ll need to create a fluorescein solution by extracting the fluorescent substance from a yellow highlighter and dipping it in rubbing alcohol.

This solution will allow you to see the glowing effect when exposed to your UV light. Once you have the solution ready, shine the UV light on it and observe the glowing effect, which should be impressive if everything is working correctly.

Next, to ensure everything is functioning as expected, you’ll need a dark room and a few materials to test it out. Enter the dark room and ensure there are no other light sources that could interfere with your results. Shine the UV light on a white sheet of paper, and you should see it fluoresce, confirming that the light is working as intended.

For a more accurate test, you can use detectors designed to measure radiation, which will give you a precise measurement of the light’s intensity. Another way to test the UV light is by taking photographs under its exposure. This will help you identify any areas where your light may not be working properly, as the photographs will show what is visible under the UV light.

Applications of UV Light

UV light has a wide range of applications in different fields:

  • Blacklights: Commonly used at parties and events to create a unique and colorful atmosphere.
  • Crime scene investigations: Helps detect blood and other bodily fluids that are not visible to the naked eye.
  • Beauty industry: Used to cure gel polish and provide a long-lasting finish, as well as in tanning beds to give a bronzed look.
  • Sterilization: An effective method for killing bacteria and viruses in hospitals and laboratories, often used to disinfect surfaces.
  • Psoriasis treatment: Helps reduce inflammation and itching.
  • Mineral identification: Used to identify and distinguish minerals based on their fluorescence properties.
  • Counterfeit detection: This helps identify counterfeit currency and credit cards as they contain fluorescent markings that are not visible under normal light.
  • Entertainment, health, and science: Plays an important role as a valuable tool in many settings.

Safety Precautions

Working with UV light requires caution to protect yourself and others. Here are some additional safety tips to consider:

  • Wear Gloves: Protect your skin from the damaging effects of UV radiation by wearing gloves. This helps minimize the risk of sunburn and reduces the chance of skin cancer.
  • Use Sunscreen: Apply skin protection like sunscreen to exposed areas. It will create a protective layer to prevent skin damage from low-dose ultraviolet radiation.
  • Wear Protective Eyewear: Always wear safety glasses or protective eyewear to avoid damage to your eyes. Never look directly at the light source to prevent harm to your vision and overall health.
  • Follow Manufacturer’s Instructions: Always follow the manufacturer’s instructions for safe usage of the UV light equipment. This will help avoid injuries and ensure effective and safe use.
  • Handle Electrical Components Safely: When working with LED strips or other electrical components, check that all components are compatible with the power supply and voltage specifications. Use electrical tape or heat shrink tubing to insulate connections and prevent shocks or shorts.
  • Ensure Proper Workspace Safety: Work in a well-ventilated area, preferably a dry area, and keep the workspace organized. Avoid flammable materials near your work, especially when using a soldering iron. Always have a fire extinguisher nearby in case of emergencies.
  • Test and Monitor the UV Light: Always test the light and observe its functionality before using it regularly. Keep in mind the potential risks, and ensure you are working in a safe environment.

Frequently Asked Questions

What are some ways to create a UV light at home? 

There are several ways to create a UV light at home, such as using a black light bulb, fluorescent tubes, or LED lights that emit UV radiation.

Can you convert a regular light into a UV light? 

No, regular light cannot be converted into UV light as UV light requires special bulbs or LEDs designed to emit UV radiation.

How do you make ultraviolet light?

Ultraviolet light can be made using a special UV bulb or UV LEDs. These can be purchased online or at a hardware store.

What are some DIY methods for making a black light?

One DIY method for making a black light is to use a highlighter pen and shine a flashlight on the ink. Another method is to use a blue LED light and cover it with clear tape to emit UV light.

Is it possible to detect UV light at home?

Yes, you can detect UV light at home using a UV meter or a UV-detecting film, both of which can be purchased online or at a hardware store.

Conclusion

Creating your UV light at home is a fun and straightforward project. By following the simple steps outlined, you can easily build a DIY UV light using common materials like an LED flashlight, UV LEDs, and cellophane filters. As you work through the process, you’ll gain a better understanding of ultraviolet radiation and its many applications, such as enhancing room aesthetics, promoting plant growth, or even using it for sterilization and psoriasis treatment.

Always remember to take necessary safety precautions when working with UV light, including wearing gloves, applying sunscreen, and using protective eyewear. These steps will help ensure that your project remains safe while offering all the exciting benefits of UV light. Whether you’re using it for fun or functional purposes, building your UV light is a rewarding and useful project for anyone interested in experimenting with electromagnetic radiation.